


Global - Engilsh

While the steps for split AC installation may seem straightforward, a truly professional setup requires meticulous pre-planning, precision during execution, and rigorous safety protocols. Many users, when researching "how to install an AC," often underestimate the critical importance of technical nuances.
In reality, from selecting the optimal location for the indoor unit and securing the outdoor unit, to managing the connections and copper piping—any deviation in these steps can lead to diminished cooling efficiency, split AC water leaking issues, or compromised long-term operational stability. To ensure peak performance and system longevity, every phase—from indoor and outdoor unit mounting to refrigerant line sets and electrical wiring—must be executed in strict accordance with industry standards.
Indoor Air Conditioner Installation
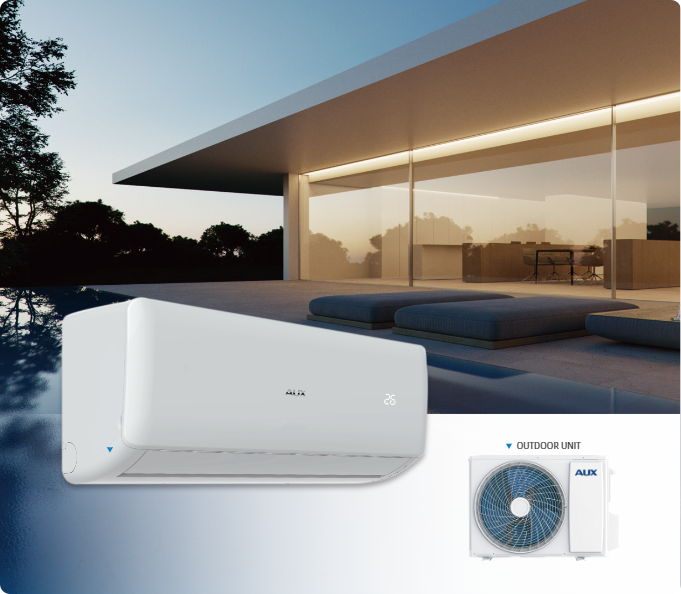
The quality of the indoor unit's mounting directly dictates the system's operational stability, cooling performance, and the accessibility for future servicing. When installing a split-type system, it is imperative to first verify that the wall structure possesses sufficient load-bearing capacity. A standardized indoor unit setup not only enhances thermal comfort but also effectively minimizes operational noise and preemptively mitigates leakage risks from the split unit at the source.
Choosing the Right Location
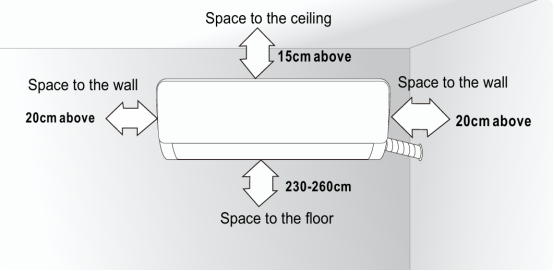
Selecting the optimal mounting position is the critical first step in a split unit setup. According to the installation specifications, the ideal location must meet the following clearance requirements:
- Top Clearance: A minimum distance of 15cm must be maintained between the indoor unit and the ceiling.
- Side Clearance: A gap of at least 20cm should be reserved between the chassis and the adjacent walls to ensure unobstructed airflow and facilitate maintenance.
- Mounting Height: The recommended ideal height for the bottom of the indoor unit from the floor is between 230cm and 260cm.
- Environmental Requirements: The mounting location must be solid and stable, situated away from direct sunlight, heat sources, steam, and flammable gases. Additionally, a minimum clearance of 1 meter must be maintained from other household appliances, such as televisions or wireless devices.
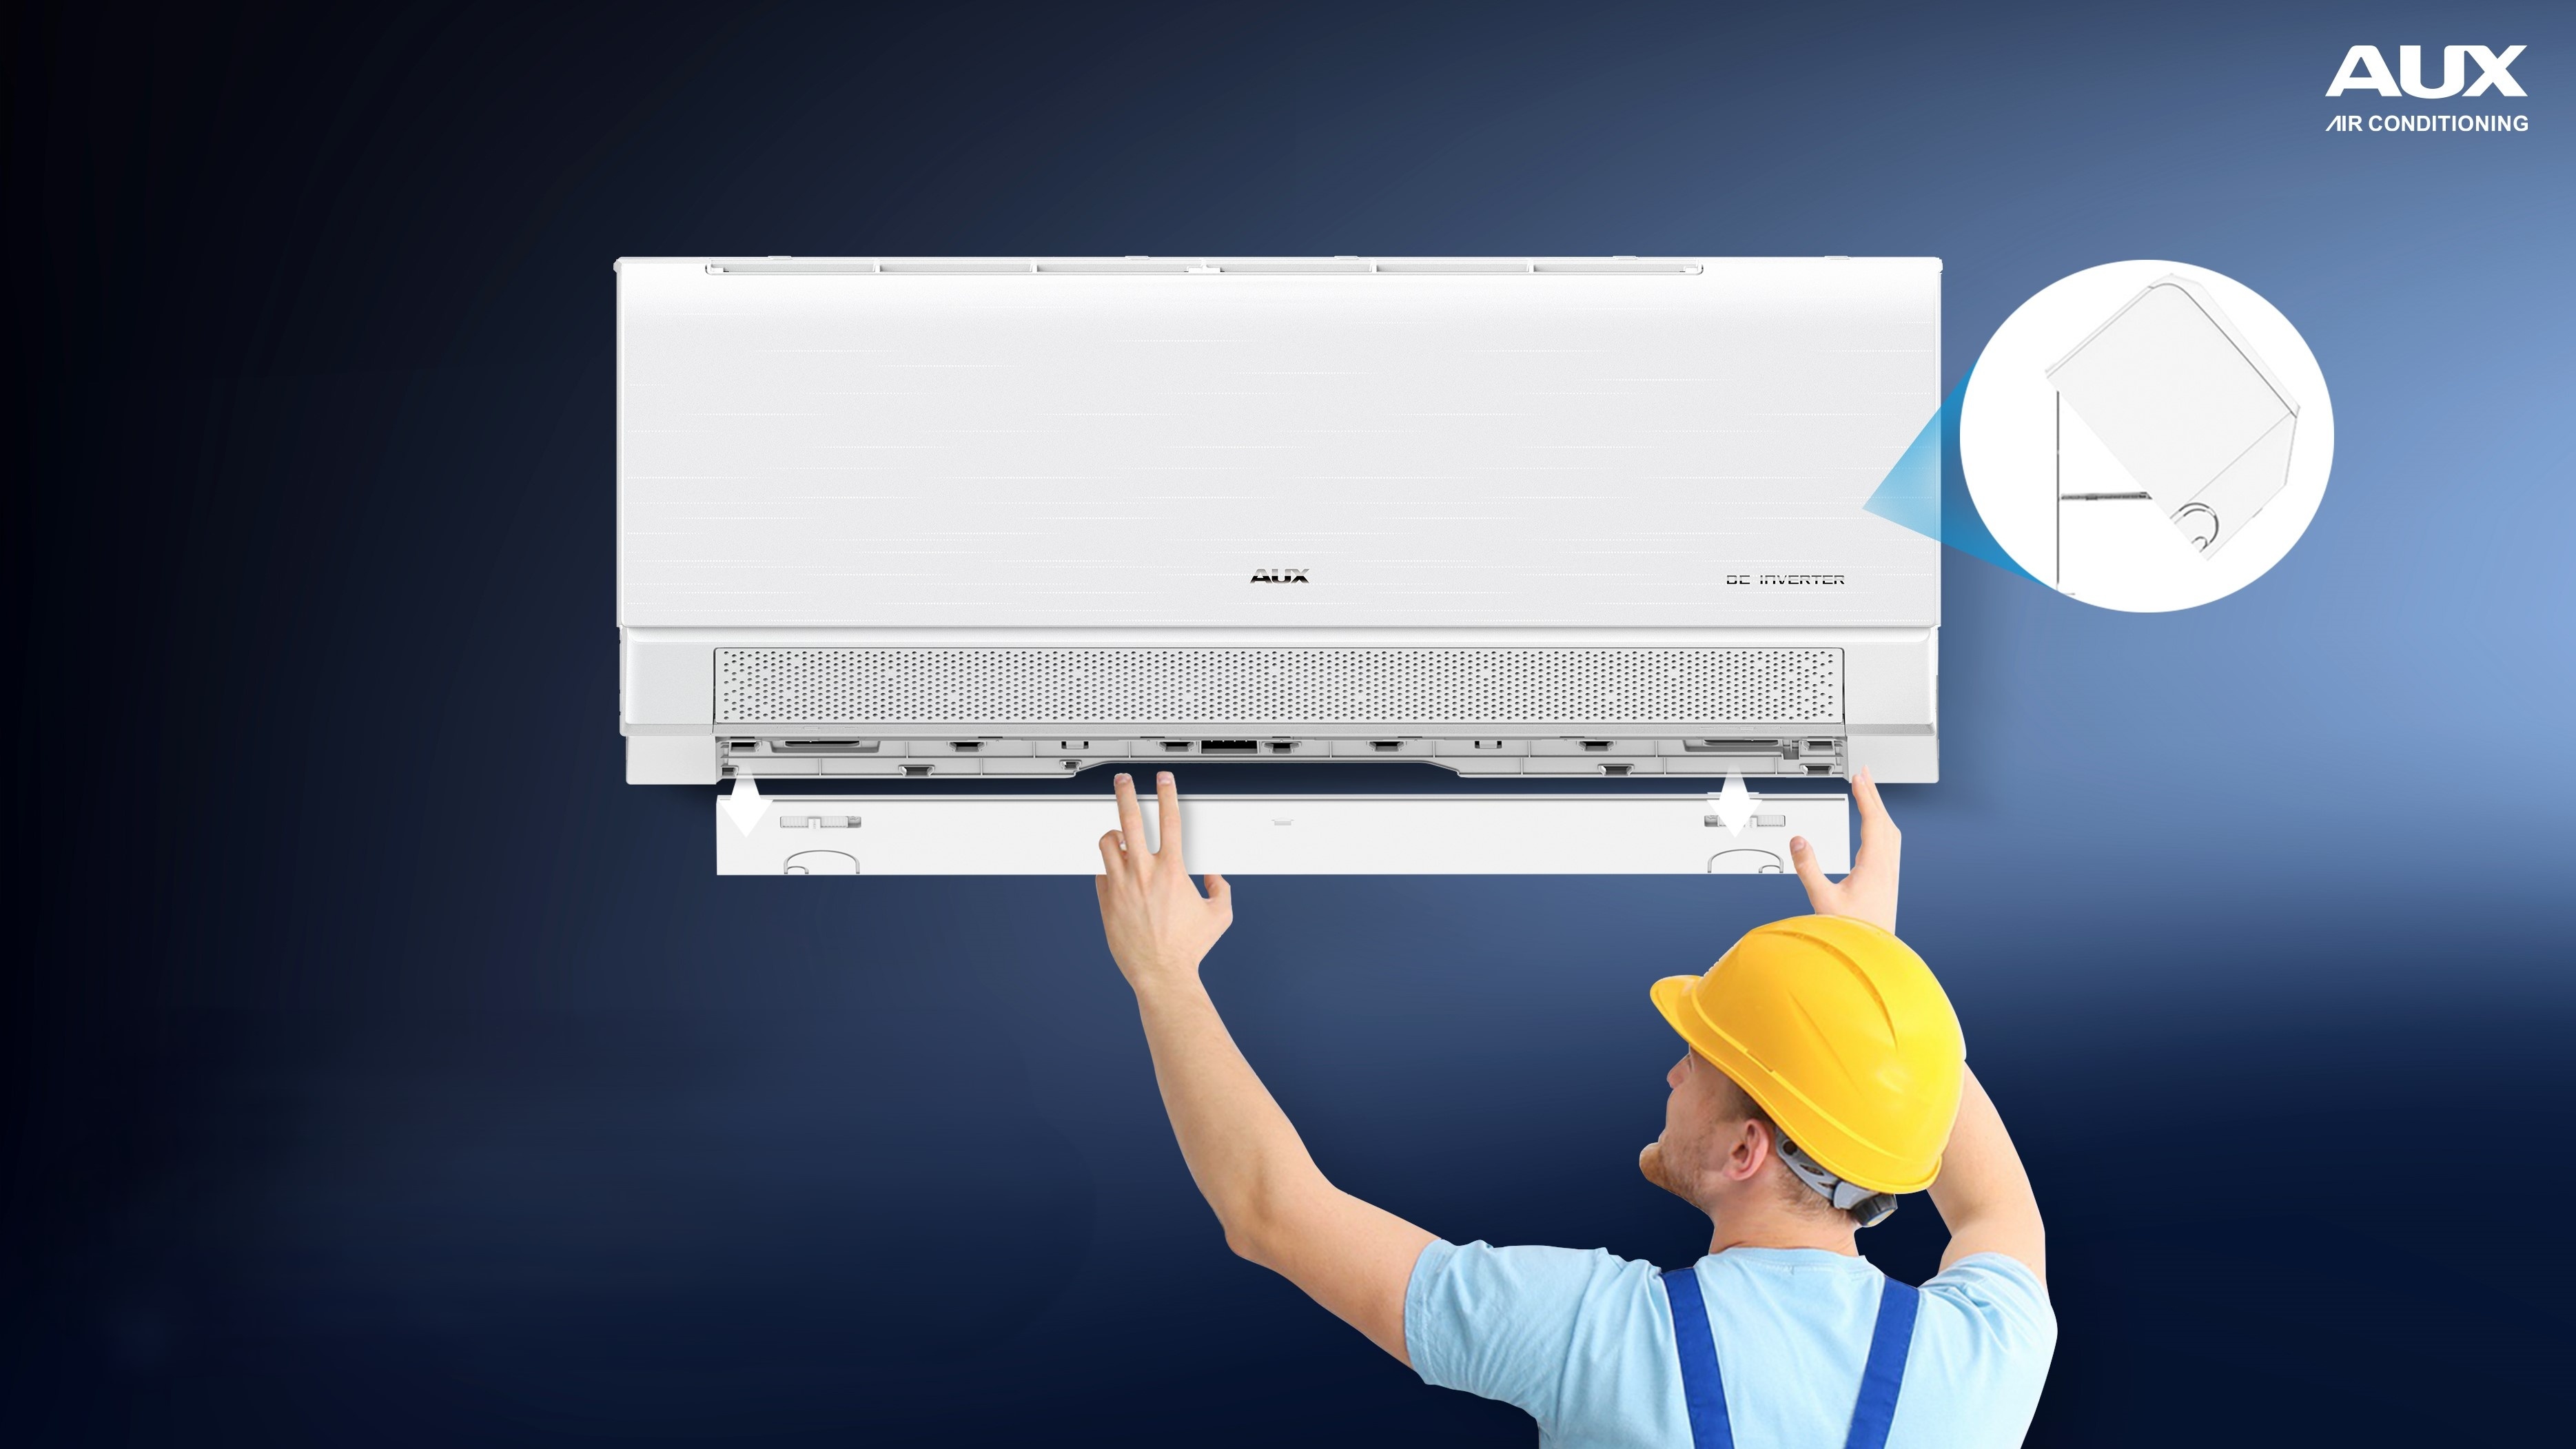
Wall Mount AC Installation
In a practical wall-mounted unit setup, the precise securing of the mounting plate and the strategic layout of the wall hole are the cornerstones of success:
- Mounting Plate Leveling: The installation of the rear bracket must be strictly calibrated using a spirit level. If the plate is not perfectly horizontal, the condensate in the drain pan will fail to collect properly, which is a primary cause of dripping from the indoor unit. Ensure that the anchor bolts are evenly distributed and tightened securely to prevent any vibration-induced noise during operation.
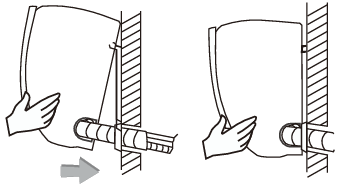
- Wall Penetration Technique: Drill a standard conduit hole (typically 60-80mm in diameter) at the designated location. During construction, ensure the exterior end of the wall hole is slightly lower than the interior end. This natural physical slope utilizes gravity to ensure smooth drainage of condensation, completely eliminating backflow or moisture accumulation within the system.

- Installation Verification: Once the unit mounting is complete, a thorough inspection of the initial routing for the copper piping, power cables, and drainage hoses is required. Confirm that the chassis is stable and sits flush against the wall, ensuring all latching mechanisms are securely locked. This final check ensures the system is properly prepared for the subsequent piping connections and moisture discharge testing.
Outdoor Air Conditioner Installation
The quality of the outdoor condenser setup directly impacts the system's heat dissipation efficiency, operational stability, and overall service life. Unlike the indoor unit, the outdoor component is perpetually exposed to the elements; therefore, the installation must fully account for ventilation conditions, structural load-bearing, and environmental safety factors. A strategic placement not only optimizes cooling performance but also effectively curtails operational noise and the risk of drainage failure.
Selecting the Installation Position
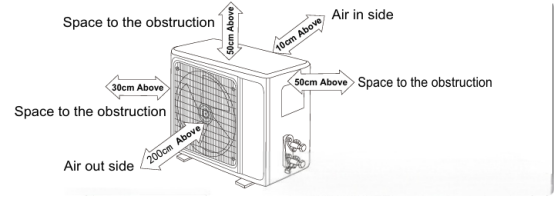
Identifying the optimal mounting site for the outdoor unit is paramount to ensuring peak system efficiency. The ideal location must adhere to the following criteria:
- Ventilation and Clearance Requirements: The installation site must be well-ventilated and free of obstructions. To guarantee unimpeded airflow, a minimum clearance of 30cm should be maintained between the unit’s rear/side panels and the wall, while at least 200cm of open space must be reserved directly in front of the air outlet.
- Environmental Buffering: The unit should be shielded from prolonged direct sunlight and kept away from high-temperature heat sources, steam, flammable gases, and corrosive environments. Additionally, ensure that the discharged hot air and operational acoustics do not cause a neighborhood nuisance.
- Structural Integrity: The mounting surface must be a solid ground or a wall with sufficient load-bearing capacity to support the equipment's weight and dampen operational vibrations.
- Service Accessibility: The chosen position must allow for convenient access during future maintenance and routine servicing.
Securing the Outdoor Unit
When securing the outdoor unit, multiple stabilization measures must be implemented to withstand fluctuating environmental conditions:
- Robust Anchoring: Utilize specialized brackets or a dedicated mounting platform, ensuring the unit feet are tightly fastened with expansion bolts to prevent displacement during operation or under high-wind conditions. In high-rise buildings or wind-prone areas, additional reinforcement measures are required to withstand extreme weather.
- Vibration and Noise Mitigation: The mounting bracket must be perfectly level. To further minimize the transmission of vibrations, it is highly recommended to install anti-vibration pads at the unit's base feet.
- Drainage Management: During heating mode or in specific environmental conditions, the outdoor unit may generate condensation at the bottom. A drain plug should be installed in the corresponding chassis port and connected to a drainage hose. This ensures that condensate runoff is discharged smoothly, preventing equipment corrosion or environmental nuisance.
- Final Acceptance: Upon completion of the outdoor unit mounting, a comprehensive re-inspection of the unit’s stability, leveling, and surrounding clearance for heat dissipation is mandatory. This ensures the system is fully prepared for the subsequent line set connection and system commissioning.
Air Conditioner Connection and Copper Pipe Setup
The interconnection of the system components and the copper piping represents the most technically demanding phase of ductless unit commissioning. This process directly dictates the system’s hermeticity, thermal efficiency, and operational safety. Refrigerant lines, electrical wiring, and the drainage network must be routed and connected in strict adherence to engineering protocols. Any oversight in these details may result in diminished cooling performance, condensate overflow, or catastrophic system failure. Before initiating the connection sequence, it is imperative to verify that both the indoor and outdoor units are securely anchored and that the pathing for all lines is optimized to prevent excessive kinking or mechanical stress.
Refrigerant Line and Split AC Copper Pipe Installation
Refrigerant line connections must utilize copper tubing that meets specified standards, ensuring the pipe diameter is perfectly compatible with the equipment. During the refrigerant line setup, the following technical requirements must be strictly observed:
- Flaring and Deburring: After cutting the copper pipe, all burrs must be thoroughly removed. Use a specialized flaring tool to create a precise flare, ensuring the surface is smooth and free of cracks to prevent refrigerant escape.
- Torque Control: When joining the indoor and outdoor unit piping, a torque wrench must be used to tighten connections to the specified values. Excessive force can deform the flared interface, while insufficient torque will compromise the seal.
- Bend Protection: The bend radius must be carefully managed when shaping the copper lines. It is strictly prohibited to allow flattening, wrinkling, or "dead bends," as these obstructions will impede refrigerant flow.
- Connection Verification: Upon completing the assembly, a comprehensive leak test is mandatory. Only after confirming superior system integrity should you proceed to the subsequent stages of the piping integration.
Electrical Wiring and Drainage Setup
Electrical integration and drainage layout serve as the dual safeguards for the long-term operational stability of the system:
- Standardized Wiring: Electrical connections must strictly adhere to the wiring diagram, ensuring that the specifications of power and signal cables meet the equipment's requirements. Terminals must be securely fastened to the binding posts, with a zero-tolerance policy for loose connections or exposed wire cores.
- Drainage Logic: The drain hose must maintain a consistent downward slope; it must not rise, form a wave pattern, or create a U-shaped trap. The discharge end of the hose should be kept clear of the ground or any water collection containers to prevent backflow or odors.
- Bundle Wrapping Technique: During the overall wrapping of the line set, the drain pipe must be positioned at the bottom of the bundle. Use specialized tape to wrap from the bottom upwards, ensuring smooth drainage and preventing any moisture seepage.
- Final Verification: Upon completion of all interconnections, a comprehensive audit of the system is mandatory. This includes inspecting the stability of line fixings, electrical grounding status, and the integrity of the drainage path. Only after confirming all systems are nominal should you proceed to the vacuum evacuation phase.
Common Split AC Installation Problems
Even with a clear process, substandard execution can still lead to operational anomalies. The following are two common issues encountered during the split unit setup phase.
Split AC Water Leaking
Post-installation moisture seepage from the indoor unit is typically associated with the following factors:
- Inadequate slope of the condensate drain hose or internal blockages.
- The indoor unit was not installed perfectly level.
- Insufficient insulation on the piping, leading to condensation overflow.
- Improper wall hole positioning, resulting in drainage backflow.
Throughout a standard ductless system setup, it is vital to ensure an unobstructed drainage system, tight piping insulation, and precise leveling of the indoor unit. If dripping from the chassis is detected, contact a professional immediately to inspect the drainage path and installation nuances. If your AUX split air conditioner displays an error code, you can refer to the AUX error code description page to help you understand the type of fault corresponding to the code.
Split AC Cooling Problem
If the system exhibits poor thermal performance after setup, potential causes include:
- Improperly sealed refrigerant line connections.
- Incomplete system evacuation.
- Copper piping length or bending methods that do not meet specifications.
- Poor ventilation at the outdoor unit installation site.
A refrigeration efficiency issue is often closely linked to the operational standards maintained during the assembly phase. A professional installation team will conduct a system hermeticity test and a trial run to ensure the refrigerant system operates correctly. If insufficient cooling persists, cease manual adjustments and have the system inspected by a certified technician.
Key Installation Precautions
Following the physical assembly of the indoor and outdoor units and their respective lines, the system enters the critical commissioning and verification phase. The precision of these final steps determines whether the unit operates under stress or achieves maximum efficiency.
1. Deep Vacuum Evacuation and Pressure Retention
This is an absolute mandatory step in the refrigerant system setup.
- Eliminating Hidden Risks: A vacuum pump must be used to completely evacuate all air and residual moisture from the lines. Non-condensable gases and moisture within the system can lead to compressor acidification and elevated electrical current.
- Pressure Observation Test: Once the vacuum reaches the predetermined level, close the manifold valves and monitor the gauge for one to two minutes. If the pressure reading remains stable without rebounding, the system is confirmed to be hermetically sealed.
2. Rigorous Sealing and Drainage Verification
- Interface Leak Detection: Utilize an electronic leak detector or high-concentration soapy water to scan all copper pipe flared joints, service valve caps, and charging ports. Ensure there is zero bubble formation.
- Gravity Drainage Test: Slowly pour water into the indoor unit’s drain pan to simulate condensate production. Confirm that the water flows out smoothly and that the entire length of the drain hose is free of waves, traps, or back-pitching.
3. Electrical and Operational Stability Inspection
- Reliable Grounding: Verify that the power and signal cable specifications are matched and that all terminals are crimped securely. It is essential to test and confirm the effectiveness of the grounding system and ensure the unit is equipped with a dedicated circuit breaker of the correct amperage.
- Vibration and Acoustic Monitoring: During the initial test run, listen closely to the compressor and both indoor and outdoor fans. If any abnormal high-frequency metallic clashing or violent vibrations are detected, shut down the unit immediately to prevent premature mechanical damage.
Should You Install a Split AC Yourself?
The setup of a ductless system is a complex undertaking that integrates HVAC engineering, electrical work, and minor construction. Before attempting a DIY project, evaluate the following technical barriers:
- Safety Redlines: Air conditioners involve high-voltage electricity and pressurized refrigerant systems. Non-standard operations can easily lead to electric shock, fire, or cryogenic burns from refrigerant sprays.
- Fire Safety Constraints: According to safety codes, the indoor and outdoor units, along with the connecting lines, must maintain a physical clearance of at least one meter from open flames, gas stoves, or other continuous ignition sources.
- High Tool Dependency: Standardized installation requires a torque wrench to prevent cracking the flared joints, a vacuum pump, and a manifold gauge set. Installations performed without these professional tools often result in refrigerant leaks within a year.
- Professional Advice: Considering that installation quality is directly linked to product lifespan and manufacturer warranty rights, it is strongly recommended to contact an officially authorized team for construction.
Professional Installation and Official Support
The core value of choosing professional services lies in the standardization of a complex process:
- Full Lifecycle Warranty Protection: Installation by certified personnel ensures the product remains compliant with manufacturer warranty terms. Damage to circuits or refrigerant leaks caused by non-professional handling are typically excluded from free warranty coverage.
- Performance Maximization: Professionals strictly control the bend radius of the copper piping and ensure every bolt reaches the standard torque value according to the manual. This significantly reduces energy consumption and can extend the compressor's service life by three to five years.
- Long-term Technical Support: Official service provides more than just the initial setup; it offers maintenance recommendations tailored to the specific model, such as deep cleaning of the condenser fins, ensuring the system maintains robust cooling output even under extreme heat.
Before installation, it is helpful to understand what a mini split system is and to choose the right system size, as both directly affect installation requirements and performance.